Category Archives: surface design

Asheville

I’m sorry I haven’t posted in such a long time.  I arrived in Asheville in mid April on a glorious spring day. The dogwoods were still in bloom soon to be followed by azaleas and  rhododendrons.  It was a wonder to drive from winter to full out spring in two days.

My “stuff” (aka my life) went into storage and I began searching for a suitable house. I found the perfect townhouse but the process of purchasing it, closing the sale and moving in was an adventure I would never want to repeat.  I finally moved in about 3 weeks ago and am still dealing with boxes and repairs.  But its all good.

The studio space is wonderful.  Large, open and with great natural light. There’s even good storage space but its going to take a while to get moved in and organized. And from where my desk (OK, folding table but I’m going to get a desk) is positioned I can look out and view the mountains.  Once my space is set up I will be excited to share photos.

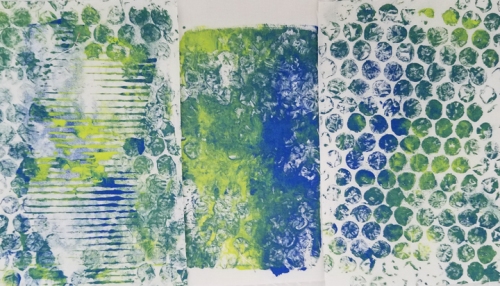
With all that has been going on there hasn’t been much time for art and the stress is not conducive to creativity.  But last night a few of us got together to form the Asheville Surface Design Group.  Our first meeting was a hands on gelli plate activity lead by Lisa Heller.  It was so much fun to play with fabric, paint and texture again.

gelli rubbing 2

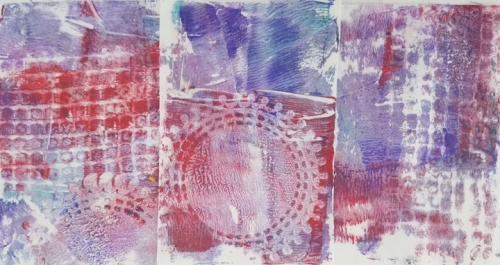
And this has convinced me that no matter what needs to be done around here I still need to feed my soul with some hands on art activity, and not to worry about coming up with a finished product but just to enjoy engaging in the process.

gelli rubbing 1

3 Comments

Filed under surface design, Uncategorized

Adventures in Dyeing

Last Monday I received Ann Johnston‘s new DVD set:DVD Cover

I had already ordered some additional dyes to fill in the gaps and a bolt of PFD.  I was anxious to get started but my schedule delayed me a bit.  But I was able to watch the DVD all the way through in a couple of sessions, mix 12 different dyes and prep the “wet” area of my studio.   I am fortunate have a decent place to work with a deep sink and a large table that is separated from my sewing space.

The DVDs are fabulous.  I feel like I am taking a class with Ann.  She shows many variations for each technique and explains how they were created and then gives a demonstration,  sometimes showing how you can get different results using the same exact dye mixtures applied in different manner.  There are more details including a preview of the DVD on her website and I highly recommend it.

I’ve managed 5 session in the past week.  Some days I have only been able to work (play?) for a few hours.  Last Thursday I had the entire day and it was wonderful.   I’m at the beginning of a series based on the seasons so I am trying to dye with that in mind.   I am also trying the different techniques Ann demonstrates and its great to be able to review her demos as I go.

Green on plastic chain

wrapped on a plastic chain

Wrapped on a plastic chain

I’ve had some luck with Shibori both on a 3″ PVC pipe and wrapped on foam pile insulation.  Ive played with rope, marbles, rubber bands

Shibori and Spring Greens

B W shibori

Shibori on 3″ PVC

Shibori overdye on pipe insulation

Shibori overdye on pipe insulation

Also with variations of folding, pleated and clamping

Red and blue on folded square

I am keeping track of the techniques, timing, recipes, etc. in a book.  Everything is numbered and dated with samples of the test strip and photos of the finished pieces.  I am up to #25 now and just getting warmed up.

Project Book

This is so fun I’m amazed it is legal.  Thanks Ann!

Fall Parfait

Color “parfait” – fall

6 Comments

Filed under surface design

Deconstructed Screen Printing

Last week members of the Northern Michigan Textile Artists met at North Central Michigan College for deconstructed screen printing workshop.   I took a 5-day workshop in this technique with Kerr Grabowski a few years ago.  I love the process but am usually limited to summertime when I can do this type of work outside.  So I decided to join in the fun at the college.  The first week we prepared our screens with MX Procion dyes that had been mixed with print paste.  We laid the screens over a variety of found objects before applying the thickened dyes.  I used bubble wrap, a mesh vegetable bag, rubber bands, toothpicks, etc.

A week later after the screens had thoroughly dried we used the print paste as a release agent to transfer the dyes to the fabric.

I got 9 “pulls” from the first screen and they varied from dark to light.  Here’s a close up of one from the middle of the run.

I had high hopes for the second screen.  The large circular element is a placemat that I thougtht would be striking.

But when I removed it from the dried screen most of the dye stuck to the placemat rather than the screen.  The results were disappointing.  The color is not bad but the detail is not what I had hoped for.

I had time for one more small screen.  I placed down brown craft paper and scattered toothpicks.  Then used what a could scrounge at the end of the session–a mixture of red and orange that wound up a gorgeous red-orange that reminds me of nasturtiums.

I have six small pieces but they are the most interesting results from the workshop.  I’ve already cut the fabric and  plan to take it to the Focus on Fiber retreat with me next week and do something with most, if not all, of it.

3 Comments

Filed under surface design, Uncategorized

Soy Wax Batik

On Thursday I got together with my friend Desiree Vaughn to play with soy wax batik.  Generally in the past I have started with white fabric but this time I started with several pre-dyed fabrics in addition to the white.   The first was an ugly green that turned out darker than I had intended, the next was a highly mottled celery green, also a pale chartreuse and a very pale cerulean blue.My first experiments used with the ugly green fabric ( figuring I had nothing to lose).  For the piece on the left I applied the wax with some string glued to a block and overdyed it with a combination of navy & black.  The fabric on the right used a child’s block and a paintbrush that I had notched.  It was overdyed with navy.I used some corrugated cardboard to apply the wax to the fabric on the left.  It didn’t do a great job, was messy to use and the wax cooled so quickly that I didn’t get a good image.  But I like the pattern and plan to try corrugated metal next time .   The fabric on the right is a “sampler” of various toys.  Both were overdyed with a dark orange.

I used a plastic berry basket for the pattern on each of these.  The fabric on the left is the mottled celery.  The fabric on the right started as white.  Both were dyed with a mixture of celery and chartreuse.

Both of the next two pieces started with the mottled celery cloth .  I used the same tools on each and crackled the wax before painting with the dye.  The one on the left is overdyed with the same mixture I used above (more or less) and the piece right was overdyed with purple.

Next I switched to blue.  I was trying for lighter blues since I have too many darker blues.   the piece on the left is a monoprint from dye-painting the piece on the right.  It is very light but I think its cool.More blues using the pale cerulean base.  The piece on the left is a sampler; the piece on the right is simply textured.  Both are crackled.

I used white fabric for my last two experiments.  I like the way the green & purple mix to make brown.  Unfortunately something got on the yellow & orange piece but I am planning on cutting it up so I’ll just work around it.

Working with small pieces (roughly fat quarters) gave me a chance to experiment with different techniques.   The notes I made will be useful when I am ready to tackle some yardage for a specific piece.

6 Comments

Filed under surface design, Uncategorized